
The Loom Muse Talks Cabling
Scarlett Royale
Recently there has been a boom of interest in trying cabling on the looms, and cabling has a wonderful classic look with any knitted garment. While there is the basic 2, 4, and 6 stitch cable cross being either left or right in direction, cabling can go further as to create shapes and animals when done in a particular way. Plus the way cables are worked can change dramatically when either knitting flat or circularly. This post is to explain those differences and to help you keep in mind when working with cables which way a cable is going and how to make it happen. Plus an added challenge to see how much you have learned. ;-)


2 Stitch Cable Cross Hat Pattern
Many times to keep up with which way you are crossing your stitches is to read which way the cross is happening. Then lets say we are doing a right cable cross, this means that the stitches that are going to be facing out are going to need to be in front and leaning towards the right. Give yourself a mental image when looking at a pattern as to how you can create that crossing. Typically you will need to move and work your stitches that will be in back first, then your stitch that will be in front will be moved or worked last. For instance I will write up a short set up for a 2 and 4 stitch cable cross, pay attention how you are working them. To understand this basic idea of how a cable works and what you typically work 1st and last will help you in the future to do your own cabling without the need of other designers.
Check out Joanna's New Patterns using the 2 peg cable crossing. The Tera Ear Warmer, Boot Toppers, and Fingerless gloves. Plus her new Aviator Hat.


Working from Left to Right Cabling
2 Stitch Right Cable Cross: EW peg 2, place it on stitch hold, then move stitch 1 to peg 2, place stitch 2 on peg 1, EW peg 2 and your cable is complete.
2 Stitch Left Cable Cross: Place stitch 1 on stitch holder, then EW peg 2, place stitch 2 on peg 1, and place stitch 1 on peg 2 and EW peg 2 and your cable is complete.
4 Stitch Right Cable Cross: EW peg 3 and 4, place stitch 4 then 3 on the stitch holder, then EW pegs 1 and 2, place stitch 2 on peg 4 and stitch 1 on peg 3. Then place stitch 3 on peg 1, and stitch 4 on peg 2 tighten your loops and your cable is complete.
4 Stitch Left Cable Cross: Place stitch 2 and 1 on your stitch holder, then EW pegs 3 and 4, move stitch 3 to peg 1, and stitch 4 to peg 2, the place stitch 1 on peg 3, and stitch 2 on peg 4, EW pegs 3 and 4, tighten your loops and your cable is complete.
Looking at what is above, think about how you would have to go about doing this if you were to go from Right to Left instead of Left to Right.
The pattern below shows an example of going circularly and then flat both. Please visit the link to purchase the pattern to with video included. This also shows how to do a the small braid cable in circular and flat.
Braided Hooded Cowl


Click here to get the Braided Cat Hat Pattern. Click here for Renee's Cozy Cable Collection. The pattern includes video as well. Also the 9 Stitch Chunky Cable Braid Hat which uses 9 stitches and cable crosses 6 stitches left and right with the middle 3 stitches interchanging. This cable is more difficult in keeping up with what crosses what. Every other row is a cross, and with braids the middle 2 or 3 pegs of the 6 peg or 9 peg set interchanges from 1 side to the other of the cable depending on which cross you are doing for a 4 or 6 stitch cable cross.

The 2 patterns below are cables turned into looking like an owl, because this is done circular the cables remain the same. It is more trouble keeping up with which side is crossing which direction. The owl cable is easier than the braid, but you need to keep in mind you can divide the owl in half what you do on one half of the owl you do the opposite on the other side to create a mirror. Typically you can use 4 or 8 pegs to create the owl. The Owl Hat above is done with 4 pegs, and the Owl Booties to the left are done with 8 pegs. The good news is it is based on te 2 or 4 stitch cable crossing so once you figure which direction you need you can create this one on your own. To play with this and not get involved in a massive process try the owl ornament above. In the near future I will be adding the Owl Gloves which is working flat rather than circular, so the pattern has the possibility of change.


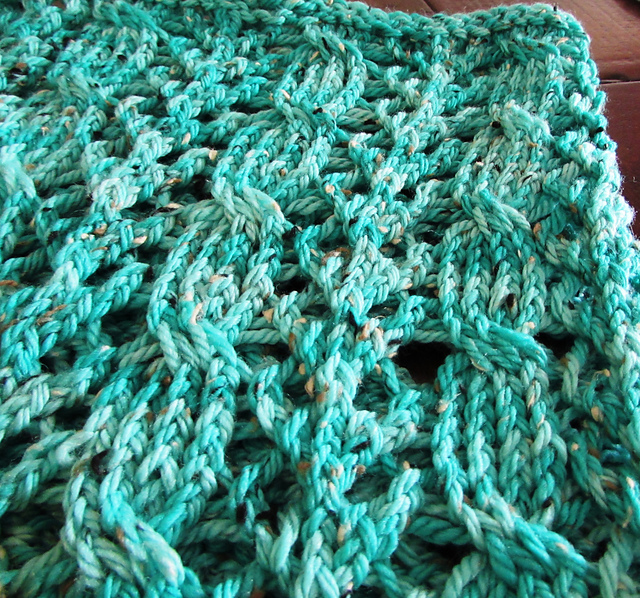


Cabling can be added to lace garments for an extra movement to a piece. Above is my lace cable sandle, but Renee Van Hoy has done a recent beautiful Sunlight Cowl with cabling in it please check it out and give it a purchase!!! Also some newer patterns that have a hint of lacing added with cables is my Leaf Poncho and Melissa Bise Cables and Ladders Cowl. Above are a 4 stitch cable crossing mixed with lace techniques.


Then there is cableing that can create a 3D effect or other effects like ripples. Examples above show up in the Great Afghan Project. This also shows how yarn and the change of knit to purls can create a different look for cabling as well.
There is also such a technique that is only a 3stitch cable cross with normally includes a single stitch that will be purled. It is great for creating diamonds and other shapes. The video below shows the technique to create a diamond pattern with the 3stitch cable cross.
For instance going from left to right:
3LCC: Put peg 1 on the stitch holder and EW pegs 2 and 3. Move stitch 2 to peg 1 and stitch 3 to peg 2, then place stitch 1 from peg holder onto peg 3 and Purl you have completed your cable.
3RCC: Skip pegs 1 and 2 and Purl stitch 3 and place onto stitch holder, then move stitch 2 to peg 3 and stitch 1 to peg 2, place stitch 3 onto peg 1, and EW pegs 2 and 3 you have completed your cable.
Keep in mind when going the opposite direction you will reverse the steps.

Now there are stipulations when getting up to a certain size cable, like the 6 stitch right cable cross, that with a loom that has pegs further apart than the 1/2" gauge you will have a very very hard time creating and even in the end the stitches do not look even and the appearance doesn't look as well. Otherwise 4 and 2 stitch cables can be done with just about any gauge, just not 6 or above without doing other technique which I may show in the future. The hat below is an example on a 5/8" gauge and to save the hat I have to go in and weave all the extra yarn and go in and individually smooth out my stitches with the cable area. It isn't to say it can't be done, but it is a lot more effort to make look clean.

Knifty Knitter Replacements and 4 Piece Combo Pack (Adult)


If all this seemed a bit mind boggling and you want to cheat a cable with the faux braid pattern, check out my new book of Garter Slip Chain which incorporates a new way of making the faux braid that had a faked out cabling look. As well as my Spiral Faux Braid Hat.


Cable Challenge

18 pegs 1/2 gauge Flat
EW CO 18
Row 1: P5, EW8, P5
Row 2: P5, 4LCC, 4RCC, P5
Row 3: P4, 3RCC, EW4, 3LCC, P4
Row 4: P3, 3LCC, P1, EW4, P1, 3RCC, P3
Row 5: P2, 3RCC, P2, 4LCC, P2, 3LCC, P2
Row 6: P1, 3LCC, P3, EW4, P3, 3RCC, P1
Row 7: P1, EW2, P4, EW4, P4, EW2, P1
Row 8: P1, EW2, P4, EW4, P4, EW2, P1
Row 9: P1, 3LCC, P3, 4LCC, P3, 3RCC, P1
Row 10: P2, 3RCC, P2, EW4, P2, 3LCC , P2
Row 11: P3, 3LCC, P1, EW4, P1, 3RCC, P3
Row 12: P4, 3RCC, EW4, 3LCC, P4

Love Love Love
ReplyDeleteThank you
Scarlett Royal